
Crates on castor's, nothing new, I realise that but we needed something for the little chaps growing (scarily out of control) choo choo collection, as he calls it, and a cardboard box just wasn't cutting the mustard as they say but a nice little castored crate would do the job just nicely. I will keep the following simple, as well it is simple and very quick. I realise the internet is full of similar projects but on the off chance there is someone who may think this kind of thing is harder than it is, then hopefully this may be of some help. If not, ignore the writing, you can look at the pictures and check out my boys toy vehicle collection instead.
So first things first, you need to get a crate, you can buy crates on eBay, I believe on average for about £28. This is a rip off, I think they are utilising the crates being everywhere trend and personally I would never pay this, they are probably very nice crates and have been restored exceptionally but to me that is a lot of money for an old crate. My crate is an oldish pear crate courtesy of my dads loft, not an option for you lot, but you can ask in local fruit shops and wine merchants. King Kwak payed £10 for three huge crates, from a small, slightly manky looking hard wear store up by Kings Cross recently, so I suggest looking around before paying lots on eBay. Next you need castor's, mine cost £6.99 from eBay. Again I looked around, but this seems to be the best deal. If you were not fussy on colour, then you will be able to pick castor's up cheap as chips. For this project I have gone for the non braked variety.
Mark Holes, drill holes:

First give your crate a slight sand and remove any splinters. Next flip the box over, place the castor's where you wish them to be, quite near the edge and evenly spaced is advised. With a pen, mark each screw hole, once done pop castor's to one side and drill through each pen mark.
Two minute interval:

Enjoy a little break whilst the little chap comes to inspect your work and drives his little choo choo over the box.
Screw:

You will need appropriate sized nuts and bolts, ours are courtesy of Homebase. Switch the drill to a screw driver, and screw in each bolt.
Nuts and bolts:

Once each bolt is in place, flip the box back over and fasten each nut. We have gone for pretty short bolts so they don't stick up too much. As the base of our crate is slated I added a piece of leftover MDF to the bottom, to stop little toys falling out all over the place. I used MDF as I had that to hand, but I am sure a piece of thick cardboard box would equally do the trick.
Boys toys:

And that is it. Once finished the little chaps toy collection was added and he was good to go.
Playtime:

The box is pretty durable and should last some time, outgrowing his choo choo obsession and into any following collections, and he is very happy to push it around and play wherever he chooses to play. It is also often used as a little cart with his sister pushing him around inside it.
Handles?:
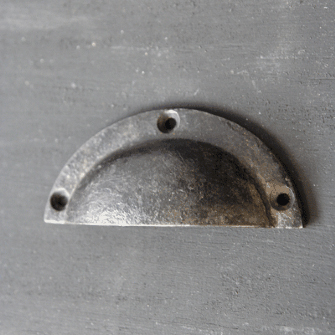
Now I did consider putting handles on the shorter sides. First I was going for a single piece of rope pull, but thought it might not be too safe for the babies, then next I wanted something like this. I soon realised it didn't really need it right now but maybe it will be more suitable later for its next contents.
Cost: Crate: free, castor's: £6.99, nuts and bolts: £1.99. Total: £8.98
Supplies: Crate, castor's, nuts and bolts, drill with drill bit and screw bit, pen and sand paper.
Time taken: 15 minutes, with no baby naps as baby clearly wide awake.
So I hope you like it, again excuse the simpleness of it. So do you have any alternative small toy storage ideas? Particularly those for little choo choo's, and if anyone has any further tips for picking up cheap crates/ wooden boxes they would like to share, I am sure it would be most appreciated.
No comments:
Post a Comment